Wednesday, February 22, 2012

The Master Bedroom REVEAL!!!

Hi Friends! So...I have a VERY exciting reveal for you today...one that I've we've been working on for a couple of weeks ;) Yes...my lovely hubby did help me paint the bedroom this last weekend but this room has been a work-in-progress for weeks now; first we de-cluttered/cleaned the entire room...then, we ripped all of the quarter-round off of the baseboard trim to prepare for me painting our oak trim a beautiful shade of crisp white (for step-by-step directions of how we are painting our trim, see this post.) After the trim was painted and fully dried, we put new quarter-round on (we bought the pre-primed stuff and only had to use one coat of our trim paint...it's fairly inexpensive and it is an extra step we are willing to take to ensure no messy paint jobs getting onto our beautiful, original hardwood floors!)
I have to admit that I was so excited about this project that I forgot to take before pics...I know, I know...I should know better by now but sometimes I get so overwhelmed with excitement that it takes over my brain and body and I just dive right in without taking before shots...I promise to be better :)
Here are some pics of the "after" with the trim painted:
 Because I forgot to take the before pics, here is a picture of what our walls were before; they were a tan and a burnt orange; we had a really pretty burnt orange quilt with gold and teal accents...I know it doesn't sound "that pretty" but it really did look good together; I would describe it as very warm and romantic and as much as I loved the cozy/warmth/romantic feel of our bedroom, it was time for a change! Both Chris and I were craving a lighter, more airy feel so I searched for months (literally months because I'm SO indecisive!) for new bedding; I finally decided to go with this beautiful set below from West Elm; I ordered both the quilt set with euro shams that's a really pretty shade of brown/grey and then the duvet cover and shams is the Ikat pattern with a color pallet of cool greys and warm browns/tans and white...it's SO pretty! Anyways, after I did my happy dance when that big brown West Elm box arrived on our front door step, the hunt for the perfect paint color was in full force!
 Again, as you can see...this mama is a bit indecisive ;) After having anxiety attacks thinking long and hard, I narrowed it down to two choices...I know, we are talking major progress! haha!
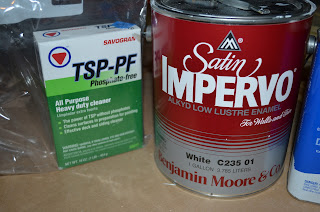
After we had it narrowed down to the two choices, I literally could NOT choose...you'd think I was making a choice that would affect the rest of my life the way I was up in arms about it...my lover bug of a husband (thank God he loves me for me...quirks and all!) helped me rationalize this choice and we just decided on one and went with it...no turning back...................well, that is until we spent all Friday night priming (we had to take this extra step due to our dark, burnt orange walls) and got up bright and early Saturday morning so excited to get that new beloved color on the walls...I opened the can and had this horrible feeling...like someone punched me in the stomach (I know, a bit dramatic but that's how I felt!) because it just didn't 'seem' like the same color as the swatch...I painted some on the wall anyways and that bad feeling in my stomach just got worse...it looked like the same exact tan that we had just got done covering up and we went through far too much work to not have a change...so there we sat, coffee in hand and literally watched the paint dry just to be 100% sure that we still wouldn't like it when it was dry...after about 20 minutes, it was dry to the touch and you guessed it, we still didn't like it :( Boo to the Hoo! I had a pitty party for about 5 minutes until Chris, that little lovey, cheered me right up by cracking some inappropriate jokes! I can always count on him to make me laugh! Anyways, away we went, back to Lowe's, to get the other color that we were previously deciphering between...all I can say is although it totally sucks that we wasted $30 on a can of paint, I am SO glad that we went back for the more "grey" version of the colors because we are both blissfully in love with our new bedroom color! Here is the big reveal..............and P.S. our room looks SO MUCH bigger with the new paint color, the new window treatments (hung them high and wide to give the illusion of much bigger windows...and it worked!) I go in there every chance I get and I just look around and smile...A LOT! And I even pet our new bedding because it makes me so happy :) That makes two rooms done (bathroom and now our bedroom) and only two more bedrooms (buggy's room and future nursery), living room, kitchen and basement to go! Ughh...back to reality as that is still quite the list but we are having fun as we go...and that's all that matters right?!
Hope you guys love it as much as I do!!!
 Our little make-shift window seat <3

 One of our most favorite wedding gifts...a personalized "Amanda and Chris Fordham" sign that just happened to be grey and black...again, how perfect! We hung it above our closet and it looks so good there...and yes, the closet doors still need to be painted! They are hideous slider doors that are so old but for now, they will have to work!
One last close up of the new bedding set...looks good eh?!
What do you guys think?! I'm dying to know :) Any big projects you guys are crossing off your lists as well?!
Oh...and one more thing............lady bug turned 18 MONTHS yesterday...man does time fly by! I can hardly believe that she has been here for 18 months already...I honestly cannot imagine our lives without her...she brings SO MUCH joy and happiness to our lives!
xoxo,
Amanda

Wednesday, February 15, 2012

Valentine Fun!

Hi guys! Hope you all had a fantastic Valentine's Day...I know I did; I got to "work from home" with my little lady bug because our daycare mom is sick so my day was filled with lots of X's and O's!!!
I know the big Love Day is already over but it's never to late to share all the fun Valentine Fun we had goin' on at the Fordham household!
Our decorations this year were kinda lame but that's because with all these house renovations we are working on, it was hard to find the time to decorate...I LOVE Valentine's Day so with all the wonderful ideas found on Pinterest, I have big plans for next year!
 Here I just used the candles and hurricanes that I had used for my Christmas decorations and replaced the pine cones with candy-conversation hearts; I bought two bags from Wally-World for about $5...we ate the leftovers...after handing each other one by one and reading the little love notes! haha! I know, I admit, we are really lame ;)
It was easy, cheap and added some Valentine Fun to our table!
I picked up these little love birds at Kohl's on clearance (I think they were around $15 for the pair!) I just couldn't resist...they were so cute and buggy liked them too...they will probably go in her room eventually.
Yep, that's it for decorations...like I said, kinda lame this year but that just means next year is going to rock your socks off!!
We made Valentine's peanut butter cookies that were mmm...mmm...GOOD! I love anything that has peanut butter and anything that has chocolate so naturally, the peanut butter blossom cookies are my fav! I always make them at Christmas time with the Reese's Peanut Butter Cups in the middle and when I was strolling through the Valentine aisle at TarJay, I saw the Reese's Hearts and I thought they would be PERFECT for some Valentine's cookies! SOOOOOO simple...I never claimed to be Betty Crocker but I sure do love how easy she makes it for those of us who are not so good in the kitchen:
 All you do is follow the directions on the back; cookie mix, 3 Tbsp of vegetable oil, 1 Tbsp of water and 1 egg...mix until dough forms...roll into balls; roll around in sugar and bake at 375 for 8-10 minutes; while the cookies are in the oven, I unwrapped and ate the hearts and when the cookies were done, I immediately pushed the hearts into the cookies and they melted down a bit into the cookie but still kept their cute heart shapes! Delish and SO EASY :)
TaaDaaaa!
Rylee had a Valentine Party at daycare on Monday (they celebrated a day early because some of the kiddos were going to be gone...it's a good thing they did the party a day early since our daycare mom was sick yesterday!) Anyways, I wanted to do a homemade Valentine treat for Rylee to share with her friends versus the store-bought ones so after snooping around on again, Pinterest (Yes, I fully admit I am addicted!) I put together a few different ideas to make them our own; this is what we came up with:
"Bear Hugs for Friends! Love, Rylee"


I just mixed the four different kinds of Teddy Grahams with gummy bears and filled the treat bags full! Then I made homemade gift tags with scrapbook paper and personalized them for all of her little friends :) Rylee snacked while mama worked!
They were a hit at the party!
And lastly, I had to do a quick client visit last night and when I got home, I came home to these:
Beeeeaaaaaauuuuutiful flowers from my hubs and a cute little love bug from my buggy :) How cute and SO SWEET...I am one lucky gal!
So how bout you guys, did you have a good Lover's Day?! I sure hope so!
xoxo,
Amanda


Tuesday, February 7, 2012

I can see the light!

Hi friends! I hope your week is starting off great :) It's still way above average temps for February in MN so this mama cannot complain...I'm LOVIN' the warm weather! I have spring fever so bad...I just can't wait to get outside and plant flowers and go for a run and soak up the sun! Only two more months to go!!!
Speaking of spring fever, I have been craving the look of lighter, brighter paint in our home...we moved a little over four years ago and haven't really done much of anything for paint; the walls were all painted a a light tan color and the kitchen was a light yellow...as you know, we have major plans for the kitchen but we actually have major plans for the entire house! I have to keep reminding myself to slow down because I am getting decorator's ADD...no lie! I'm just feeling so excited about transforming the look of our entire house...finally making it home sweet home...and a stylish, much, MUCH brighter home sweet home might I add :) I'm tired of the dark walls and dark woodwork...I know some people think it as an omen to paint over original wood work and although I understand and respect those opinions, I've finally had enough of it! Our house was built in the early 50's and everything is original woodwork so I struggled with it a bit myself just growing up knowing how beautiful and sacred those original pieces are but the more and more I thought about it (4 plus years to be exact) the more I came to this conclusion: this is our home...a place that we are raising our babies...a place where we are making memories each and every day and I want it to be light and bright and our own style...I want to come home and feel home...I want to feel happy when I look around at the walls and the trim and well, you get my drift...this is our home so we are going to do with it what we want and not worry about what anyone else thinks or worry about how it may or may not affect resale some day...we're living for today and today...we want our dark oak trim to be a lovely shade of white!!!!!! I started in the bathroom...figured it was a safe place to start as I can't start in the living room because we have plans to take a wall out...more on that to come! Anyways, after lots and lots of research, this is what we went with:
I really, really, REALLY did NOT want to have to sand down all the wood work so we investigated other options and we also sought out professionals advice; they told us for the best results, clean all wood work with TSP solution (just mix cleaner with warm water and scrub it down...allow ample drying time!) Then came the question...primer? or no primer? Our woodwork is a darker oak...more reddish/orange then yellow so with that being said, they told us that we could skip the priming part and just use 2-3 coats of the paint pictured above. Now, I wasn't thrilled (to say the least) about this paint because it's oil-based which = more VOC's and it is very expensive...but we tried to weigh the pros and cons and after doing all this research and seeking out professional advice, we decided that it was our best option...especially if this mama is going to spend hours, days, probably WEEKS and maybe even months painting all the trim in the house! I would be devastated if I put that much time into a painting project (that I've been dreaming about for years mind you) just to have the stain of the wood bleed through...because that's what we were warned about over and over! With deciding not to prime, the oil-based paint is an even better option as well because it really sticks to the wood and that's what you risk in not sanding the trim. To support small, local businesses, we picked this can of paint up at our local Struve's paint store; the finish is BEAUTIFUL and I knew that because my cousin is currently flipping her first home and she just got done spraying all of her trim with this very same paint...because it's oil-based, it's MUCH less upkeep and can stand some wear and tear (aka. big, black dog named Bella and pretty little lady bug running into everything as she takes her baby for a walk in the stroller!!!) The downfall, like I mentioned was first of all, the VOC's which if it was just Chris and I, I probably wouldn't have even given it a second thought but with buggy, I really worry about what those fumes could do...I painted on Sunday and had all the windows open with fans running and you couldn't even smell the paint. The paint guy at Struve's, who said he's worked there pretty much all of his life, told us that as long as we had good ventilation, there would be no worries...so we just went with it! We had the bathroom fan running all day/all night and I had to finish with one more coat yesterday morning while buggy was at day-care...I kept the bathroom fan running again all day and all night again. It took 3 full coats which was a little depressing but I just keep telling myself that it will all be worth it in the end!
 The view from the hallway, side by side buggy's room with the original (ugly) oak trim!
 The view with the door open! SO MUCH brighter...I LOVE!
Hi Friends :) haha! See that sunburst mirror in the back?! I made that little lovey for about $5 total...I plan on doing a step by step post soon...it was so fun and it looks so stylish...and expensive!
And one last view from inside the bathroom...isn't is lovely?!
I'm not going to lie though...it was a tedious, looooonnnnnng process and it's one of those projects where you're silently crying to yourself thinking, "self, what the HELL did you get yourself into?!" followed with a couple mini-panic attacks but after it's all done...there is nothin' but smiles and happy dances!!! For the rest of the house, we are taking off all the existing quarter-round trim first of all because it will make painting the original trim (baseboards) waaaaaay easier and will keep the paint off of our beautiful, original hardwood floors. 
Also, quarter-round is very inexpensive and you can buy it pre-primed which then it will only take one coat of the expensive paint! We can paint it outside this spring and when it's dry, we can just nail it down! We are also replacing all the bedroom doors (because they are cheap and hollow!) We will just spray all the new doors and hang once dry...they will look a lot like the bathroom door with the panels which I LOVE...it gives it kind of a cottage-like feel :) So there ya have it...now you know what I've been up to all weekend...hope you love it as much as I do! Happy Tuesday guys!
xoxo,
Amanda
P.S. What did you guys think of the Superbowl commercials...kinda lame if you ask me!!! That's usually what I get the most excited for...well that and the half-time show. Although, I did the love the Bud Light, "here we-go" dog commercial...HILARIOUS! 

Friday, February 3, 2012

Paperclip Magnets

Hi guys, happy Friday! Hope you've had a great week! Mine has been...well, to keep it candid...it's been pretty crappy :( As I mentioned on Monday, it was my birthday on Tuesday and I was SO SICK the whole night before and the whole day on my birthday...like I literally saw midnight come and go and mid-puke session I thought to myself..."self, happy fricken birthday!" Haha! I can laugh about it now because I am feeling SO MUCH better but it was a TERRIBLE flu bug and I was feelin' pretty sorry for myself...however, after some fluids, some tender lovin' TLC from my hubby and bleach-cleaning everything, I am back and feelin' much better! I had some extra time this afternoon so I put together this fun, very easy, very quick, DIY paperclip magnet project to display some photos at my real-life job...I have a cubicle that has a magnetic strip at the top and I have been searching for some cute, magnetic photo clips but have not found any...so I thought why not just make my own?!
I found these  cute little clippies at Micheal's (after my coupon they came out to be around a buck!) and I just used an old magnet that we had received in the mail from our mortgage lender (it had a cheesy calendar on it)...I just cut it into strips and hot-glued the strips on the back of the clips and taaa daaaa...donzo! Yep, it was that easy!
 All the supplies!
 The magnetic clippie with this ADORABLE picture of my hubby when he was 3...so cute :)
And a close up...I just had to because this picture is so stickin' cute...Yes I know, buggy looks JUST LIKE HIM...it's okay, I hear it pretty much EVERYDAY (I swear she's mine too!)
Pretty easy huh?! Kind of a fun idea for displaying your photos without having to put holes in them because usually the office cubicles are made of a thick, heavy-duty fabric that you can pin things up with these special pins but I just hate putting holes in my pictures and now I don't have to :)
Plus, they are super festive with Valentine's Day coming up and all...love is in the air...I can feel it...can you?!?! :) Have a good weekend!
xoxo,
Amanda